terravision
TerraVision
AI-Powered Terraform to Architecture Diagram Generator
![]()


![]()
⚠️ Alpha Software Notice
This software is in alpha testing. Code is shared “AS IS” without warranties. Use at your own risk.
Table of Contents
- What is TerraVision?
- Quick Start
- Key Features
- Installation
- Basic Usage
- Documentation
- Supported Cloud Providers
- Contributing
- License
What is TerraVision?
TerraVision automatically converts your Terraform code into professional cloud architecture diagrams. Quickly visualise any Terraform code to analyse what would be created in the cloud, AND keep your documentation in sync with your infrastructure. No more outdated diagrams!
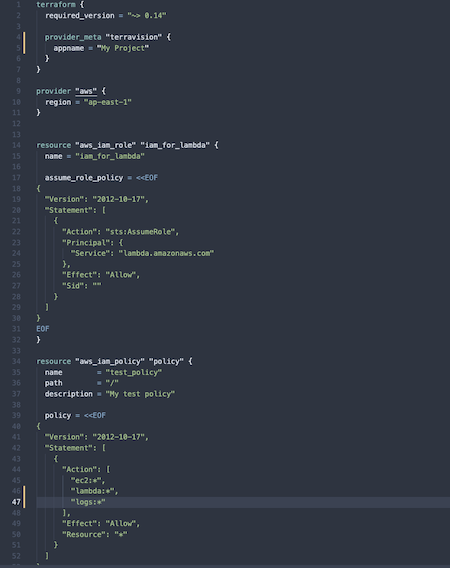
Turn this Terraform code:
Into these architecture diagrams:


Why TerraVision?
- ✅ Always Up-to-Date: Diagrams generated from actual Terraform code as the single source of truth
- ✅ 100% Client-Side: No cloud access required, runs locally to keep your data secure
- ✅ CI/CD Ready: Automate diagram generation in a pipeline whenever a PR is merged
- ✅ Free & Open Source: No expensive diagramming tool licenses
- ✅ Multi-Cloud: Supports AWS, GCP, and Azure
Key Features
🎨 Professional Diagrams
- Industry-standard cloud provider icons (AWS, GCP, Azure)
- Automatic resource grouping (VPCs, subnets, security groups)
- Clean, readable layouts
- Multiple output formats (PNG, SVG, PDF, JPG, and many more)
- Editable draw.io export - open in draw.io, Lucidchart, or your favorite diagram editor
🤖 AI-Powered Refinement
- Automatically fixes resource relationships
- Adds missing logical connections, labels, titles and icons as needed
- Ensures architectural diagramming best practices
📝 Customizable Annotations
- Add custom labels and titles
- Include external resources not in Terraform
- Override automatic connections
🔄 CI/CD Integration
- GitHub Actions, GitLab CI, Jenkins support
- Show multiple environments using TF Variables to document variants of your infrastructure (e.g. prod vs dev)
- Pre-generated plan mode: Use
--planfileand--graphfileto skip Terraform execution entirely — no cloud credentials needed in the diagram step
🔒 Secure & Private
- No cloud credentials required
- Runs entirely on your local machine
- No external API calls (except optional AI features)
Quick Start
Option 1 - Docker
You can run terravision from within a Docker container. Pull the pre-built image from Docker Hub:
docker pull patrickchugh/terravision:latest
Or build it yourself from source:
git clone https://github.com/patrickchugh/terravision.git && cd terravision
docker build -t patrickchugh/terravision .
Then use it with any of your terraform files by mounting your local directory to the container:
If you pulled from Docker Hub, use patrickchugh/terravision as the image name. If you built locally, use terravision (or whatever tag you chose).
# Using Docker Hub image
$ docker run --rm -it -v $(pwd):/project patrickchugh/terravision draw --source /yourproject/ --varfile /project/your.tfvars
$ docker run --rm -it -v $(pwd):/project patrickchugh/terravision draw --source https://github.com/your-repo/terraform-examples.git//mysubfolder/secondfolder/

# Using self-built image
$ docker run --rm -it -v $(pwd):/project terravision draw --source /yourproject/ --varfile /project/your.tfvars
$ docker run --rm -it -v $(pwd):/project terravision draw --source https://github.com/your-repo/terraform-examples.git//mysubfolder/secondfolder/
Depending on your cloud provider, you may need to pass your credentials so that OpenTofu/Terraform can run terraform plan commands
For example, for AWS:
# Example 1 Mount AWS Credentials folder
docker run -it --rm  -v $(pwd):/project  -v ~/.aws:/home/terravision/.aws:ro  patrickchugh/terravision draw --source /path/to/terraform_source
# Example 2 Pass credentials as environment variables
docker run -it --rm  -v $(pwd):/project  -e AWS_ACCESS_KEY_ID=your-access-key -e AWS_SECRET_ACCESS_KEY=your-secret-key  patrickchugh/terravision draw --source /path/to/terraform_source
Option 2 - Local Install
Before installing TerraVision, ensure you have:
- Python 3.10+ - Download Python
- Terraform 1.x - Install Terraform
- Graphviz - Install Graphviz
- Git - Install Git
- Ollama (Optional - for local AI refinement) - Install Ollama
Install TerraVision
pipx install terravision # only if in a virtual env, you can use pip install terravision instead
Verify Terraform Setup
Before generating diagrams, ensure Terraform is working:
# Verify Terraform is installed
terraform version
# Should show v1.0.0 or higher

# Configure cloud provider credentials
# AWS:
export AWS_ACCESS_KEY_ID="your-access-key"
export AWS_SECRET_ACCESS_KEY="your-secret-key"
# Or: aws configure

# Azure:
export ARM_CLIENT_ID="your-client-id"
export ARM_CLIENT_SECRET="your-client-secret"
export ARM_TENANT_ID="your-tenant-id"
export ARM_SUBSCRIPTION_ID="your-subscription-id"
# Or: az login

# GCP:
export GOOGLE_CREDENTIALS="path/to/service-account-key.json"
# Or: gcloud auth application-default login

# Test Terraform can initialize and plan
cd tests/fixtures/aws_terraform/static-website  # or azure_terraform/test_vm_vmss
terraform init
terraform plan
# Should complete without errors
cd -
Note: TerraVision needs Terraform to successfully run terraform plan to parse your infrastructure. Cloud credentials are required for TERRAFORM to validate resources and resolve functions, but TerraVision itself never accesses your cloud account. Alternatively, use --planfile and --graphfile to provide pre-generated Terraform outputs, bypassing Terraform execution entirely.
Important for Terraform Enterprise and Remote Backend Users: TerraVision automatically forces local backend execution (ignoring remote state) to generate diagrams showing the complete infrastructure definition, not just deltas. This ensures accurate architecture visualization regardless of your configured backend.
Option 3 - Nix
If you have Nix installed with flakes enabled, you can enter a development shell with terravision and all dependencies available:
git clone https://github.com/patrickchugh/terravision.git && cd terravision
nix develop
This provides terravision, graphviz, terraform, and git in your shell. You can also run it directly without cloning:
nix run github:patrickchugh/terravision -- draw --source /path/to/terraform --show
Try It Out!
Generate your first diagram using our example Terraform code:
git clone https://github.com/patrickchugh/terravision.git
cd terravision

# Example 1: EKS cluster with fully managed nodes (auto)
terravision draw --source tests/fixtures/aws_terraform/eks_automode --show

# Example 2: Azure VM stack set
terravision draw --source tests/fixtures/azure_terraform/test_vm_vmss --show

# Example 3: From a public Git repository and only look at subfolder /aws/wordpress_fargate (note double slash)
terravision draw --source https://github.com/patrickchugh/terraform-examples.git//aws/wordpress_fargate --show
That’s it! Your diagram is saved as architecture.png and automatically opened.
Use Your Own Terraform Code
# Generate diagram from your Terraform directory
terravision draw --source /path/to/your/terraform/code
Use Pre-Generated Terraform Plan (No Cloud Credentials Needed)
If you already have Terraform plan output (e.g. from a CI pipeline), you can generate diagrams without running Terraform:
# Step 1: Generate plan and graph files (in your Terraform environment)
terraform plan -out=tfplan.bin
terraform show -json tfplan.bin > plan.json
terraform graph > graph.dot

# Step 2: Generate diagram (no Terraform or cloud credentials needed)
terravision draw --planfile plan.json --graphfile graph.dot --source ./terraform
This is especially useful in CI/CD pipelines where Terraform runs in one step and diagram generation happens in another. See CI/CD Integration for examples.
Use TerraVision simply as a drawing engine with a simple JSON dict
# Generate a JSON graph file as output (default file is architecture.json)
terravision graphdata --source tests/fixtures/aws_terraform/ecs-ec2
# Draw a diagram from a simple pre-existing JSON graph file
terravision draw --source tests/json/bastion-expected.json
Installation for Developers / Power Users
Detailed installation instructions: See docs/INSTALLATION.md
Basic Usage
Generate a Diagram
# From local Terraform directory
terravision draw --source ./terraform

# From Git repository
terravision draw --source https://github.com/user/repo.git

# With custom output format
terravision draw --source ./terraform --format svg --outfile my-architecture

# Open diagram automatically
terravision draw --source ./terraform --show
Common Options
| Option | Description | Example |
|---|---|---|
--source |
Terraform code location | ./terraform or Git URL |
--format |
Output format (see Supported Formats) | png, svg, pdf, jpg, etc. |
--outfile |
Output filename | architecture (default) |
--workspace |
Terraform workspace | production, staging |
--varfile |
Variable file | prod.tfvars |
--planfile |
Pre-generated plan JSON file | plan.json |
--graphfile |
Pre-generated graph DOT file | graph.dot |
--show |
Open diagram after generation | (flag) |
--debug |
Enable debug output | (flag) |
Supported Output Formats
TerraVision supports all output formats provided by Graphviz, plus native draw.io export. Use the --format option to specify your desired format:
| Format | Description |
|---|---|
png |
Portable Network Graphics (default) |
svg |
Scalable Vector Graphics - ideal for web |
pdf |
Portable Document Format - ideal for printing |
drawio |
Editable diagram format - open in draw.io, Lucidchart, or other diagram editors |
jpg / jpeg |
JPEG image format |
gif |
Graphics Interchange Format |
bmp |
Windows Bitmap |
eps |
Encapsulated PostScript |
ps / ps2 |
PostScript |
tif / tiff |
Tagged Image File Format |
webp |
WebP image format |
dot |
Graphviz DOT source |
json |
Graphviz JSON format with layout info (different from graphdata output) |
xdot |
Extended DOT format with layout information |
For the complete list of Graphviz formats, see the Graphviz Output Formats documentation.
Editable Diagrams with draw.io Format
Generate diagrams you can edit in your favorite diagram editor:
terravision draw --source ./terraform --format drawio --outfile my-architecture
This creates a .drawio file that can be:
- Opened directly in draw.io (desktop or web)
- Imported into Lucidchart (File → Import → select .drawio file)
- Edited in any diagram tool that supports the draw.io/mxGraph format
Perfect for adding annotations, adjusting layouts, or incorporating TerraVision output into existing documentation.
Note: --format json produces Graphviz’s JSON format (includes layout coordinates). For TerraVision’s simple graph dictionary format, use the graphdata command instead.
Export Graph Data
# Export resource relationships as JSON
terravision graphdata --source ./terraform --outfile resources.json
More examples: See docs/USAGE_GUIDE.md
Documentation
For Users
- Installation Guide - Detailed setup instructions
- Usage Guide - Commands, options, and examples
- Annotations Guide - Customize your diagrams
- CI/CD Integration - Automate diagram generation
- Troubleshooting - Common issues and solutions
For Developers
- Resource Handler Guide - Handler architecture
- Contributing Guide - How to contribute
- Developer Guide - Development setup
Advanced Topics
- AI-Powered Refinement - Using AI to improve diagrams
- Performance Optimization - Tips for large projects
Supported Cloud Providers
| Provider | Status | Resources Supported |
|---|---|---|
| AWS | ✅ Full Support | 200+ services |
| Google Cloud | 🔄 Partial Support | Core Services |
| Azure | 🔄 Partial Support | Core services |
CI/CD Integration
Pipeline Workflow
graph LR
    A["📝 Source Code<br/>Checked into Git"] --> B["🧪 Test"]
    B --> C["🔨 Build/Deploy"]
    C --> D["📊 Generate Diagrams<br/>TerraVision"]
    D --> E["📚 Document"]

    style A fill:#e1f5ff
    style B fill:#fff3e0
    style C fill:#f3e5f5
    style D fill:#e8f5e9
    style E fill:#fce4ec
GitHub Actions
Use the official TerraVision Action:
# .github/workflows/architecture-diagrams.yml
name: Update Architecture Diagrams

on:
  push:
    branches: [main]
    paths: ['**.tf', '**.tfvars']

jobs:
  generate-diagrams:
    runs-on: ubuntu-latest
    permissions:
      id-token: write
      contents: write
    steps:
      - uses: actions/checkout@v4

      - uses: hashicorp/setup-terraform@v3

      - name: Configure AWS credentials
        uses: aws-actions/configure-aws-credentials@v4
        timeout-minutes: 2
        with:
          role-to-assume: arn:aws:iam::1xxxxxxx8090:role/githubactions
          role-session-name: ghasession
          aws-region: us-east-1

      - uses: patrickchugh/terravision-action@v1
        with:
          source: .
          format: png

      - name: Commit Diagrams
        run: |
          git config user.name "github-actions[bot]"
          git config user.email "github-actions[bot]@users.noreply.github.com"
          git add architecture.dot.*
          git commit -m "Update architecture diagrams [skip ci]" || exit 0
          git push
- AWS Example - You will need an IAM role the action can assume and a Trust policy granting github to assume it
Without Cloud Credentials (Pre-Generated Plan)
If Terraform runs in a separate pipeline step, pass the plan and graph files to TerraVision:
# .github/workflows/architecture-diagrams.yml
name: Update Architecture Diagrams

on:
  push:
    branches: [main]
    paths: ['**.tf', '**.tfvars']

jobs:
  generate-diagrams:
    runs-on: ubuntu-latest
    steps:
      - uses: actions/checkout@v4
      - uses: hashicorp/setup-terraform@v3

      - name: Configure AWS credentials
        uses: aws-actions/configure-aws-credentials@v4
        with:
          role-to-assume: arn:aws:iam::123456789012:role/terraform-role
          aws-region: us-east-1

      - name: Terraform Plan
        run: |
          cd infrastructure
          terraform init
          terraform plan -out=tfplan.bin
          terraform show -json tfplan.bin > plan.json
          terraform graph > graph.dot

      - name: Generate Diagram (no credentials needed)
        run: |
          pip install terravision
          terravision draw \
            --planfile infrastructure/plan.json \
            --graphfile infrastructure/graph.dot \
            --source ./infrastructure \
            --format png
GitLab CI / Jenkins / Other
Use the Docker image directly — no additional setup needed:
# GitLab CI example
generate-diagram:
  image: patrickchugh/terravision:latest
  script:
    - terravision draw --source ./infrastructure --outfile architecture --format png
  artifacts:
    paths:
      - architecture.png
Full CI/CD guide (GitHub, GitLab, Jenkins, Azure DevOps, generic): See docs/CICD_INTEGRATION.md
Contributing
We welcome contributions! See CONTRIBUTING.md for:
- Code of conduct
- Development setup
- Pull request process
- Coding standards
Support
- Issues: GitHub Issues
- Discussions: GitHub Discussions
- Documentation: docs/
License
Refer to LICENSE text file
Acknowledgments
TerraVision uses: